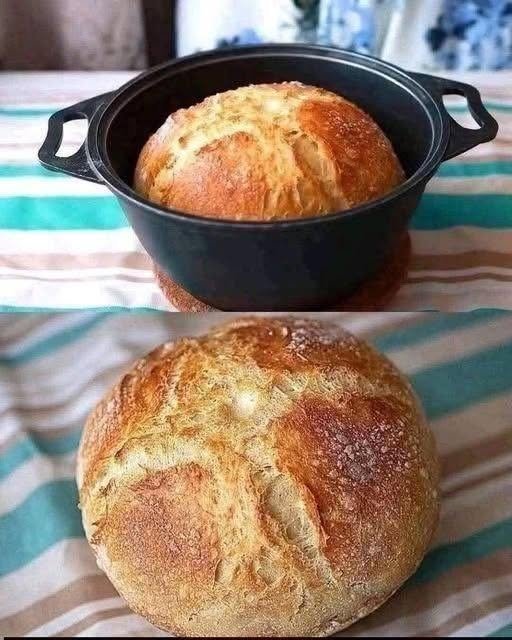
The Ultimate Guide to Baking Fluffy and Delicious Homemade Bread at Home
There is truly nothing quite like the wonderful smell of fresh bread baking in your own oven. Walking into a kitchen filled with the warm, yeasty aroma of a golden loaf instantly makes any house feel like a cozy home. While many people think baking bread from scratch is too difficult or takes special professional skills, the truth is that you only need a handful of basic pantry items. Making your own loaf allows you to control every single ingredient, ensuring there are no hidden preservatives or artificial additives in your food.
Baking bread is an ancient art that brings a deep sense of joy and satisfaction. When you watch a dense ball of dough rise up into a tall, beautiful loaf, you feel a true sense of accomplishment. The process teaches you patience as you wait for the yeast to work its magic, but the reward is completely worth every minute. From spreading melted butter over a warm slice straight out of the oven to building the ultimate sandwich, homemade bread tastes infinitely better than anything you buy wrapped in plastic at the store.
This comprehensive guide will walk you through every step required to bake a perfect loaf in your own kitchen. We will cover preparation times, clear ingredient lists, step by step instructions, helpful baker tips, common questions, and a full nutritional breakdown. Gather your flour and mixing bowls, and let us dive into the wonderful world of home baking.
Cooking Time and Portion Details
Before we start mixing and kneading, let us look at the time and portion details so you can plan your baking day easily.
-
Prep Time: 20 minutes
-
Rise Time: 2 hours
-
Bake Time: 30 minutes
-
Total Time: 2 hours 50 minutes
-
Serving Size: 12 generous slices
Ingredients You Need
To make this wonderful recipe taste amazing, gather these simple items from your local grocery store.
Main Ingredients
-
3 cups all purpose flour (plus a little extra for dusting your counter)
-
1 packet active dry yeast (about 2 and a quarter teaspoons)
-
1 tablespoon sugar or honey (to feed the yeast and help it grow)
-
1 teaspoon salt (to enhance the flavor)
-
1 cup warm water (warm to the touch, like bathwater, but not hot)
-
2 tablespoons melted butter or olive oil (for richness)
How to Make Homemade Bread
Baking this delicious loaf is a fun and rewarding process. Just follow these simple steps to make a golden masterpiece right on your kitchen counter.
Step One: Activate the Yeast
Take a small bowl and pour in your warm water. Add your sugar or honey and stir it gently until it dissolves completely. Sprinkle your active dry yeast over the top of the warm liquid. Stir it once and then let it sit undisturbed for about 5 to 10 minutes. You will know the yeast is alive and ready when the surface starts to look foamy and bubbly. If it does not bubble or foam up, your water was either too hot or your yeast is too old, and you will need to start over with a fresh packet.
Step Two: Mix the Dough
In a large mixing bowl, combine your all purpose flour and salt. Pour your bubbly yeast mixture and your melted butter or olive oil right into the center of the flour. Use a wooden spoon or your hands to stir everything together until the ingredients form a messy, sticky ball of dough that pulls away from the sides of the bowl.
Step Three: Knead the Dough
Turn the sticky dough out onto a clean, lightly floured kitchen counter. Now it is time to knead. Use the heels of your hands to push the dough forward, fold it back over itself, and press it down again. Keep kneading rhythmically for about 8 to 10 minutes. As you work, the dough will absorb the extra flour from the counter, and it will slowly transform from sticky and rough into a smooth, elastic ball that springs back slightly when you poke it with your finger.
Step Four: The First Rise
Take a clean bowl and coat the inside with a tiny bit of oil so the dough does not stick. Place your kneaded ball of dough inside the bowl, turning it over once so the top gets lightly oiled. Cover the bowl tightly with a clean kitchen towel or plastic wrap. Place it in a warm, draft free spot in your kitchen and let it rest for about 1 and a half hours, or until the dough doubles in size.
Step Five: Shape and Second Rise
Punch the risen dough down gently with your fist to release the trapped air bubbles. Turn the dough out onto your counter again and shape it into a smooth rectangular loaf. Place your shaped dough into a greased loaf pan. Cover the pan again with your kitchen towel and let it sit in a warm spot for about 30 minutes for its second rise until it puffs up over the edges of the pan.
Step Six: Bake to Perfection
Preheat your oven to 375 degrees Fahrenheit. Once the oven is fully hot, place your loaf pan on the middle rack. Bake for about 25 to 30 minutes until the top crust turns a rich, deep golden brown. When you tap the top of the baked loaf with your knuckle, it should sound hollow. Take the bread out of the oven and carefully turn it out of the pan onto a wire rack to cool completely before slicing.
Helpful Chef Notes
-
Water Temperature Check: Always make sure your water is comfortably warm, around 105 to 110 degrees Fahrenheit. If the water is too hot, it will kill the yeast, and your bread will never rise.
-
Cooling Patience: As tempting as it is to cut into the loaf right when it comes out of the oven, let it cool completely on a wire rack first. Cutting hot bread makes the inside gummy and ruins the texture.
-
Flour Accuracy: When measuring your flour, spoon it into your measuring cup and level it off with a knife. Scooping flour directly with the cup packs it down too tightly, making your loaf heavy and dry.
Frequently Asked Questions
Can I make this bread without a loaf pan?
Yes, you can shape the dough into a round ball instead of putting it in a pan. Place the round ball on a baking sheet lined with parchment paper, score the top with a sharp knife, and bake it as a rustic artisan boule.
How should I store my homemade loaf?
Because this recipe contains no artificial chemical preservatives, it is best eaten within the first few days. Store your cooled loaf in a paper bag or a bread box at room temperature to keep the crust nice and crisp. Avoid storing it in a plastic bag on the counter, as that traps moisture and softens the crust too much.
Can I freeze homemade bread?
Yes, this loaf freezes wonderfully. You can slice the entire loaf after it cools completely, place wax paper between the slices, and store them in a freezer safe bag. Whenever you want a piece, just pull out a slice and pop it straight into your toaster.
Nutrition Facts Table
Here is an estimate of the nutrition details for this recipe based on twelve equal slices.
| Nutrient | Amount Per Serving |
| Calories | 140 kcal |
| Total Fat | 3 g |
| Saturated Fat | 1 g |
| Cholesterol | 5 mg |
| Sodium | 180 mg |
| Total Carbohydrates | 26 g |
| Dietary Fiber | 1 g |
| Sugars | 1 g |
| Protein | 4 g |
Disclaimer
Please keep in mind that the nutritional numbers listed above are close estimates and can vary depending on the specific brands and exact portion sizes you use in your kitchen. Always consume food in moderation and fit your meals into your own personal health and wellness needs. If you have severe food allergies to wheat gluten or dairy products, you must avoid making or eating this recipe entirely. Always consult with a qualified healthcare professional before making major changes to your daily diet.